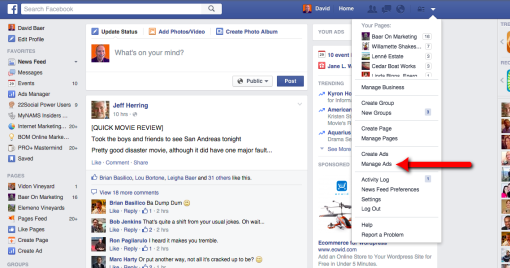
Step 1: Select “Manage Ads” from the dropdown arrow menu on the far righthand side of Facebook. (If you have never set up an ad account, you’ll possibly had a different option listed here, requiring you to establish an ads account first.)
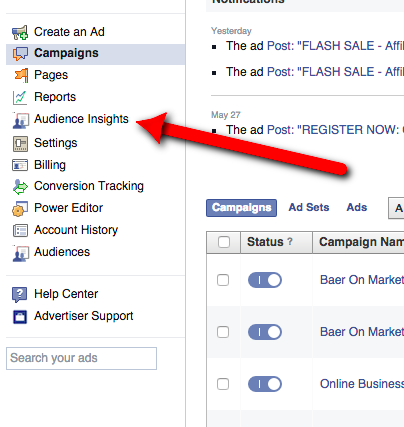
Step 2: Once inside the Facebook Ads Manager, select “Audience Insights” from the lefthand side.
Step 3: Inside Audience insights, you can research and build the ideal audience to target with your ad.
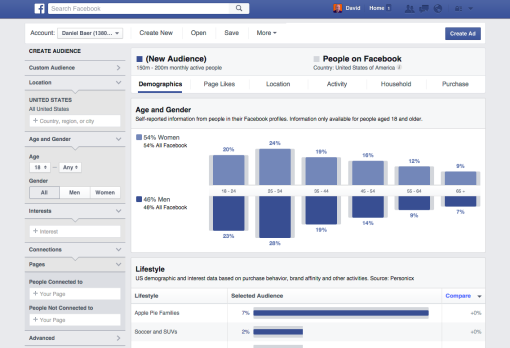
Step 4: Once you’ve created your perfect audience, click on “Create Ad” at the top of the page.

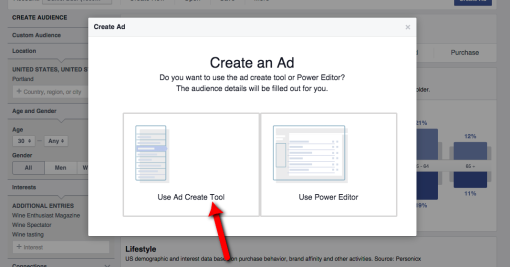
Step 5: You’ll be offered the choice of creating your ad in the standard “Ad Create Tool,” or the more advanced “Power Editor” (which requires that you use the Chrome browser). For simplicity, we will use the Ad Create Tool.
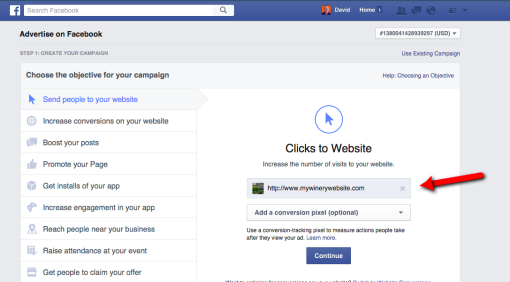
Step 6: Now you have to decide what kind of ad you’ll be running.
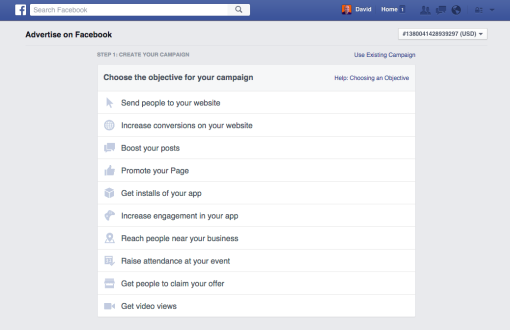
Step 7: For this example, we’ve chosen “Send people to your website.” So now it’s time to enter the destination URL where you want people to land after clicking on your ad. Remember that creating a specific landing page that is directly related to your ad will be far more effective than sending people to your website’s home page.
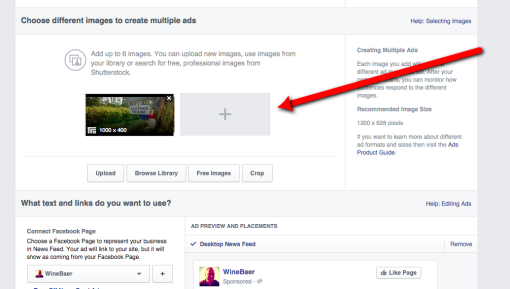
Step 8: Upload or select the image you want for your ad. You can have up to 6 different images (when displaying a single image per ad) so you can test to see which image gets more clicks. Facebook also offers the option to show multiple images in a slideshow-type format.
Step 9: Enter the text you want to display in your ad, and select a call to action button to give your ad that extra edge.
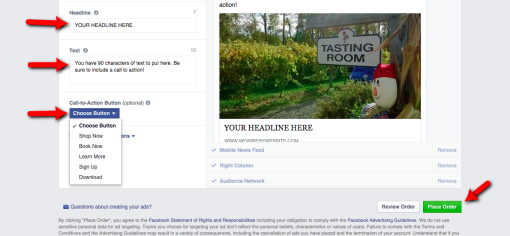
Step 10: Place your order, and await Facebook’s review and approval.
Remember that the above example is only one of many possible ad types you can run. If you’d like a more complete training on how to create ads and build a hugely effective Facebook marketing presence… Check out my course, PROFITABLE POSTING.
No comments:
Post a Comment